
And as it's Friday it's time for a new challenge over at Polkadoodles and this week the challenge is a great one for everyone - 'Spring Colours'! Nice and easy - so do have a look at the great inspiration from the DT and then join in!
For my 'Spring Colours' creation I've made what I call a 'Criss Cross Gift Card' using the Polkadoodles 'Cherryblossom Lane' cd available HERE - and there are some gorgeous images and papers on the cd suitable for all projects and occasions!

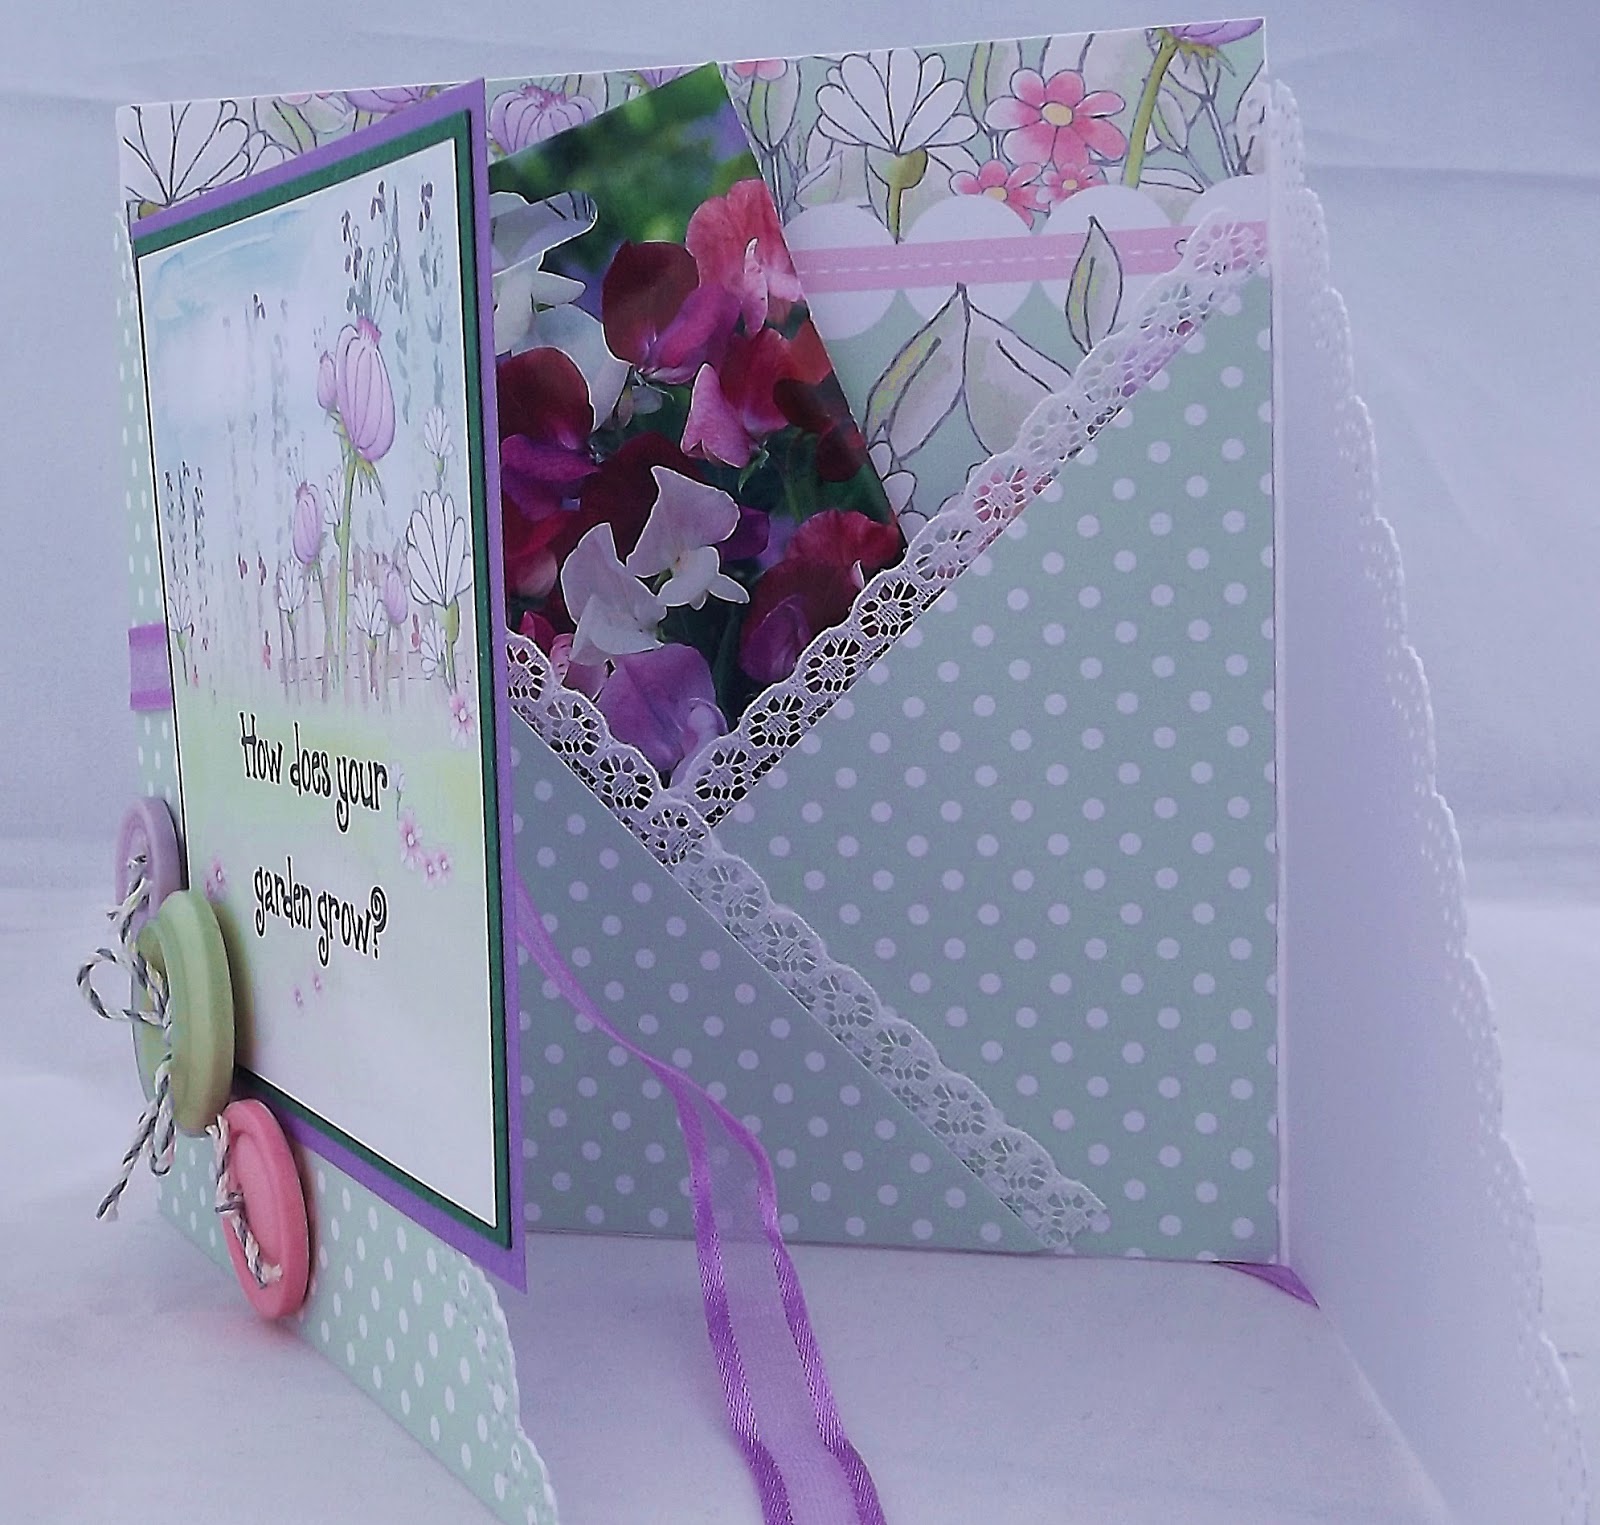
And over at Polkadoodles we've started doing some tutorials as to how to make different projects that will help give us all a little inspiration, especially when Mr Mojo goes walkabout! This week I've done a tutorial on how to make this gift card. Now, this is my first attempt at a tutorial so please be gentle with me - and I would love to get your feedback on whether it's ok and particularly if it makes sense lol!
The tutorial is below!
**************************************
This is a little tutorial on what I’ve made for this week’s challenge
and what I describe as a ‘CrissCross
Gift Card’ ! And there are quite a lot
of pics so please bear with me! The
papers and topper I’ve used are from the Cherryblossom Lane cd – with some
added wording on the topper.
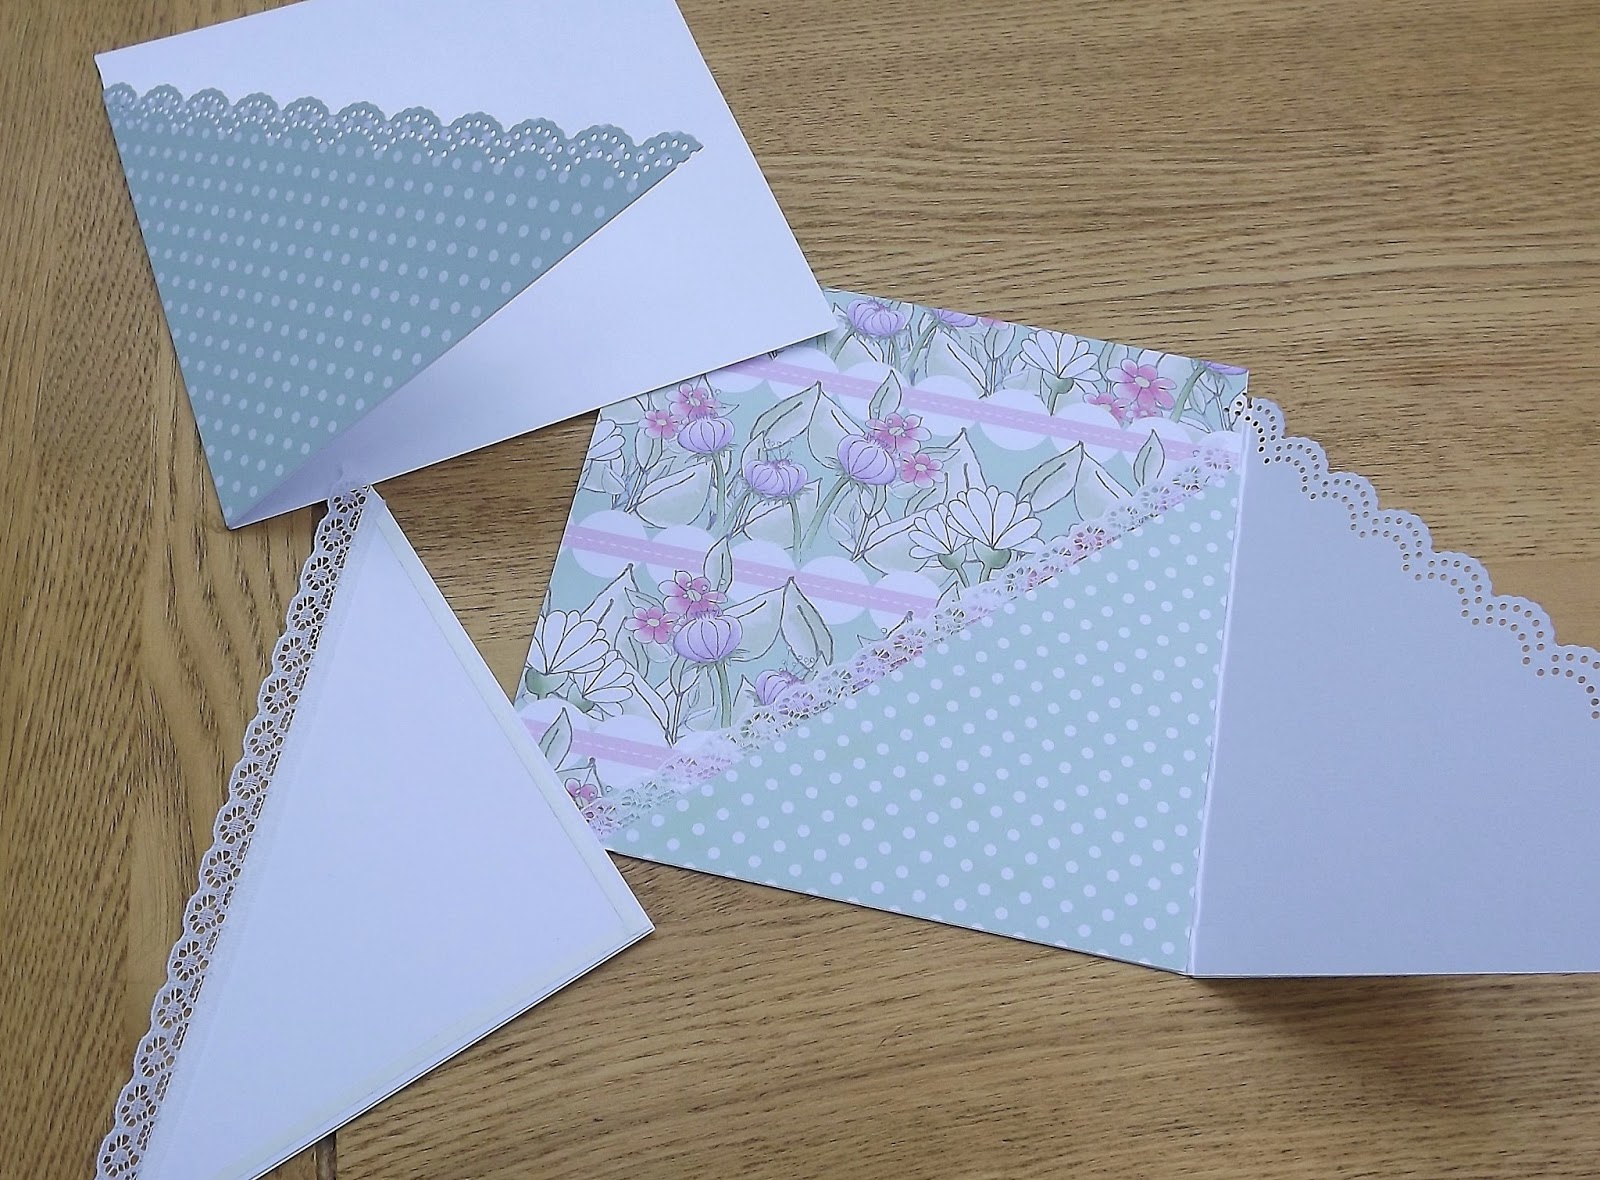
I’ve started with :-
2 x 6” square card blanks
or 2 x A4 sheets of card,
cut to 148mm x 295mm and scored & folded in half
2 (or more) sheets of design paper
A topper of choice
Ribbon or twine, embellishments, etc.

Cut the fronts of the two card blanks at a diagonal and keep the offcut
pieces.

Trim a 2cm wide strip from the long edge of the offcut triangle pieces.

Cut and stick the design papers to fit the two front triangles on the
card, the inside square of one of the cards and the two smaller triangle pieces

Edge the triangle edges with border punches, edge dies or lace,
etc. Then glue the two base cards
together so the front flaps overlap. The
smaller triangles are then glued on the inner card along two sides (probably
easier to use double sided tape to do this – not sure it shows up too well on
the photo!)
I’ve mounted the topper onto some coloured card, then used a length of
sheer ribbon that wraps around the card with plenty of length to tie a bow.


And this is the finished card with some buttons added for
embellishments! The inner triangles
form a pocket that could take a voucher or gift card – as this is a ‘garden’
themed card I’ve added a packet of flower seeds! But it would be great with different papers
and topper and a gift card added for a teenager, or Christmas papers with
vouchers inside! A nicer way of giving a
little gift!


Hope you liked the tutorial!
Back soon,
Kim x
This is beautiful Kim and you did a fab job on the tut, have a great weekend.
ReplyDeleteChris x
Kim I just couldn't pass by without saying how gorgeous this is, what a stunning creation, wow I adore the colour combo ...xx
ReplyDeleteGreat card Kim. Love the papers and image.
ReplyDeleteThanks for the tut,I will have a go at making one as I have never made one.
Hope you have a good weekend.
Traceyxxx
This is beautiful Kim, such lovely colours. Thanks for the tut too.
ReplyDeleteJo x
This is gorgeous Kim. I love the pretty colours and beautiful design.
ReplyDeleteThank you for a fabulous tutorial.
Sue xx
Really pretty, love the colours and the tut is great.
ReplyDeleteHave a good weekend.
Hugs
Cathy
xxxxx
JUst GORgeous! What FABulous colours Kim..
ReplyDeleteI LOve your papers..
Your design is awesome! Love, LOve, LOve it.
Chrissyxx
Gorgeous card Kim! I've not made a criss cross card yet, but will be giving it a try - great, clear instructions!
ReplyDeleteHugs
Gina x
Such a pretty card and fabulous clear tutorial. So clever. I am going to add this to my tutorial board on Pintrest. Thank you Kim.
ReplyDeleteLaine
xx
Oh gosh this is great. What a pretty card. I will be looking at following your fab tutorial in the near future
ReplyDeleteBest wishes Lea x
Beautiful card Kim and great tutorial :)
ReplyDeleteTags xx
Gorgeous Kim and great tut too, will definitely be giving this a go, thanks xx
ReplyDeleteSuch a gorgeous card Kim, great tutorial and beautiful papers..loving the pastel colours..
ReplyDeleteLuv CHRISSYxx
Great tutorial! How do you add text to the topper?
ReplyDeleteI find the easiest way to add text, etc., is to 'import' an image (not sure if that's the right term lol!) from the cd into a graphics program - I use Microsoft Publisher as that's one I'm familiar with! I can then alter sizing easily, add text, etc.! But I'm sure if you look on the cd, or 'google' it there are other methods! Hope that helps! thanks for looking at the tutorial!
DeleteKimx
Thanks Kim, I managed to go it in Microsoft Word! Fab tutorial and I;m going to give it a try!
DeleteThis isn't too long at all Kim. You've explained the construction in easy to understand steps and added some great pics for visual learners like me. Great job and a fabulous card design. Hugs!
ReplyDeleteGreat card and a fab tutorial, think you may just have inspired me! Lovely work, Jx
ReplyDeleteI just finished mine and it looks fab!!! Thank you x
ReplyDeletethrilled to know you've tried it - and liked it! thanks!
DeleteKim x