The DT at Joanna Sheen Challenge blog have been taking turns doing tutorials on all sorts of crafting goodies - and this was my turn! I'm not over-confident about doing these tutorials so be gentle with me lol! This is a cross between a card and a gift, and there are a few different variations on this on the web – but I think this is a nice, straightforward one – but apologies for the overload of photos!
I’ve used Joanna Sheen’s new cd ‘Age of Elegance’ which you can check out here.


You will need:-
Sheet of card – 22cm x 20cm
Sheet of card – 24.5cm x 15cm
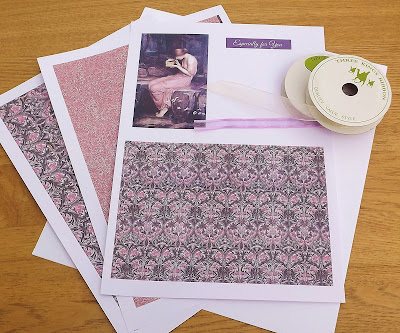
2 A4 sheets of backing papers and a topper
Small piece of acetate – 12cm x 8cm
Embellishments of choice
Edge punch
Distress ink
Ribbon
6 tealights

Starting with the box for the tealights. On the 22x20 piece of card, score along the longer side at 8cm, 10cm, 18cm and 20cm
And then score along the 20cm side at 2cm, 4cm, 16cm and 18cm

Cut out the corners as shown (I’ve shown this on white card so that score lines can be seen easier!)

I’ve used a Spellbinder label die to cut an aperture and then backed this with some acetate and double sided tape. Use double sided tape or strong glue to secure the box together, remembering to leave one end open for inserting the tealights!

Now for the card! Using the 24.5x15 card, score 11cm from either end of the longer side

I’ve used an edge punch and distress inks on both sides of the card
The design papers are used to decorate both the inside and outside of the card (I think it's easier to do this in 'panels' as it allows the card to fold easier).

The tealight box can then be secured inside the card with some strong double sided tape or glue.
I’ve then used some mulberry paper flowers, a die cut swirl and some ribbon to wrap around the box to tie.

I hope you find this tutorial useful and it can easily be adapted for chocolates or soap etc for other gifts!

Hope you find this useful! I'd love to hear your thoughts!
Back soon,
Kim x


This is fantastic Kim. Great instructions and a very pretty projects.
ReplyDeleteHugs
Cathy
xxxxx
It's a fabulous tutorial Kim and I love the papers and image you used.
ReplyDeleteSue xx
Well done on your tutorial Kim you have done a fabulous job. The finished project is gorgeous and I love the vintage image and colours.
ReplyDeleteHugs Sharon. x
Wow Kim. That is just FABULOUS! xx
ReplyDeleteKim, you have done a stunning job, the papers and design is fabulous! I have copied the instructions so that I can make one in the future - thank you!!
ReplyDeleteHugs
Gina x
This is fabulous, Kim. I love the papers and what a wonderful gift idea!! TFS and have a great week.
ReplyDeleteStunning project and tutorial Kim - thank you for the inspiration.
ReplyDeleteDebs xx
Brilliant tutorial Kim. I love the finished result - I really must have a go at this.
ReplyDeleteLorraine x
That was a perfect tutorial Kim and I love the beautiful papers and image..such a beautiful gift card..
ReplyDeleteluv CHRISSYxx
Oh wow Kim, this beautiful. Love that image and the gift box is so well designed and the papers go so well with the image and the style. Thanks for sharing the tutorial too. :) xx
ReplyDeleteFabulous tutorial Kim, stunning creation.
ReplyDeleteWendy xx
Oh wow Kim this is fab great tutorial what a lovely gift idea huggles hun Sue xxx
ReplyDeleteI love your tutorial Kim and such a lovely image too - a great gift idea - might have to pinch your idea at Christmas hugs Judith x
ReplyDeleteLove this Kim, thanks so much for sharing.
ReplyDeleteHugs
Caz x
I wonder if Martha Stewart knew how handy that particular punch was going to be in card making. It's just so versatile. Love these fun fold cards and you did a great tute on it. Beautifully done my friend! Hugs!
ReplyDelete